Do you ever need to build a shape that is not one of the standard ones that PowerPoint provides?
Luckily, PowerPoint 2010 allows you to make your own shapes.
Alan Cooke shows us how it is done.
PowerPoint 2010 has a rich set of shapes, and what’s more, the ability to modify them to suit your needs.
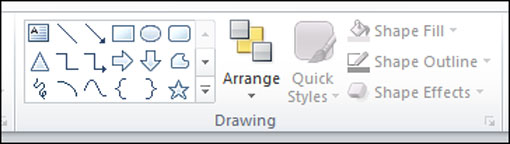
Figure 1- Shape selections and options

Figure 2 – All the shapes
Shapes can be used in a variety of ways to enhance your presentation, adding emphasis, for example with arrows, circles, call-outs etc. Figure 2 shows the full selection available.
As you can see on the right, one is spoilt for choice. But there is always that one shape they have not thought of, isn’t there? Now if only I could have…?
Well, Microsoft has addressed that issue in a very clever but somewhat hidden way. And this article is going to show you how to make just about any shape you desire. All that is required is this brief tutorial and your imagination.
But first we have to set up the ribbon to accommodate that. If you have not customised the ribbon before, now is the time. Follow these steps:
- Click ‘File’ > ‘Options’. Options is just above Exit at the bottom of the list.
- The options window will open and should look like Figure 3.
- Select ‘Customize Ribbon’ circled here.
- Another window will open and in the right hand pane will be two columns of menu items, a number of buttons bottom right and two selection fields above the columns. The left hand column is the ‘From’ column and the right lists the ribbon elements (no sample image).
- From the drop-down box above the left hand column choose ‘Commands Not in the Ribbon’.
- ‘Main Tabs’ is displayed above the right-hand column which is the default.
- Select ‘New Group’. It’s a button at the bottom of the right hand column. I wanted my new group next to ‘Editing’ under ‘Home’ so I highlighted ‘Editing’ first before I selected ‘New Group’. You can move it to any location with the arrow buttons on the right of the column if you prefer to have it somewhere else.
- Next to ‘New Group’ is a button titled ‘Rename’. Click that and give your new group an appropriate name; ‘Shapes’, for example. Don’t worry about (Custom) next to the name it will not be in your ribbon.
- Now, with your new ‘Shapes’ group selected, scroll down the left-hand column until you get to these four shape menu items. ‘Shape Combine’, Shape Intersect’, Shape Subtract’ and ‘Shape Union’. If you can’t find them it will be because you forgot to select ‘Commands Not in the Ribbon’ at the top.
- Select each one in turn and click the ‘Add >>’ button between the two columns. They will be added to the ‘Shapes’ group you created.
- Once done, close the dialog and you should see the new ribbon group top right of the ‘Editing’ group in the ‘Home’ section of the ribbon. They will be greyed out, but that’s fine.

Figure 3 – Options dialog
Making your own shape
For this article I am going to create a simple shape but the options are only limited by your imagination, so have fun when you have a try.
-

Figure 4 – Building a shape
Select the rectangle shape and drag out a fair sized rectangle in a slide.
- Next select a right-pointing arrow then draw and position it as in the figure here (Figure 4).
- Now select three more arrows and add them to each side of the rectangle to get the following result (Figure 5). Alternatively, simply copy, rotate and position the original arrow. That way the size of the arrows is the same
-

Figure 5 – All the arrows
Now select the rectangle shape as you did for the arrow and draw a small rectangle, positioning it as in Figure 6 (the small dotted rectangle below the up-pointing arrow). Repeat this so that you end up with four rectangles, one next to each arrow.
- Again, to speed up the process simply copy/paste and rotate the rectangles to give the result in Figure 7.
- Now select the four arrows and the main rectangle as a group by using Shift+Left Click. Make sure that none of the small inner rectangles are selected!
-

Figure 6 – Inner rectangle
Now you should see that the Ribbon Shape combine etc. options we added earlier are ‘active’. Select ‘Shape Combine’.
- All four arrows and the main rectangle will be combined into one main shape.
- Now select the main rectangle with the arrows and then Shift+Left Click to select each of the four smaller inner rectangles. NB. You must do it in that order. Main rectangle first and then the four smaller.
- Click ‘Shape Combine’ again. The four rectangles are subtracted from the main rectangle giving the result in Figure 8.
- Assuming that this shape’s purpose was to describe something that the arrows point to, the small boxes can be used to include text boxes. I have added North, South, West and East as a very basic idea.

Figure 7, 8 & 9 – Combining and subtracting the shapes


- Abstract
- Animal
- Animated
- Architecture
- Birthday
- Business
- Calendar
- Celebration
- Christmas
- Clip Art
- Maps
- Educational
- Engineering
- Flags
- Food and Drink
- Landmarks
- Medical
- Nature
- Pattern
- Science
- Shape
- Sport
- Transport
- Travel
- Valentines
- Weather
- Wedding
- Subtle Waves Template
- Business world map
- Filmstrip with Countdown
- Business 1
- Blue Bubbles
- Corporate 2
- Vector flowers template
- Filmstrip
- Editable PowerPoint newspapers
- Hands Template
- Red blood cells slide
- Circles Template on white
- Maps of America
- Light Streaks Business Template
- Zen stones template
- Heartbeat Template
- Web icons template
- Chalkboard